本文采用知识共享 署名-相同方式共享 4.0 国际 许可协议进行许可。
访问 https://creativecommons.org/licenses/by-sa/4.0/ 查看该许可协议。
SpringMVC 源码剖析
本文基于当前上游最新版 SpringBoot-2.3.4.RELEASE, 和 SpringMVC-5.2.9.RELEASE 讲解
1) DispatcherServlet
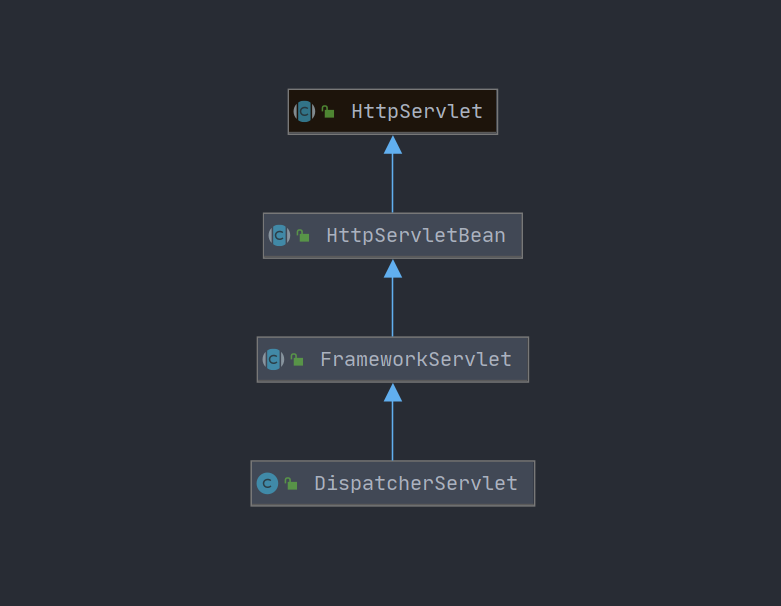
一个普通的 SpringMVC 项目中, 需要在 web.xml 中定义 DispatcherServlet 为顶层 Servlet, 那么代表 DispatcherServlet 是继承了 HttpServlet 的.
继承关系如下:
1.1) SpringMVC 初始化
1.1.1) SpringMVC 九大组件初始化链路
仔细翻阅源码之后发现, SpringMVC 的初始化入口是在父类的 init 方法中, 也就是 Servlet 第一次被请求才初始化调用的 init 方法, 被定义在父类 HttpServletBean 中.
    public final void init() throws ServletException {
        // 1. 启动参数加载
        PropertyValues pvs = new ServletConfigPropertyValues(getServletConfig(), this.requiredProperties);
        if (!pvs.isEmpty()) {
            try {
                BeanWrapper bw = PropertyAccessorFactory.forBeanPropertyAccess(this);
                ResourceLoader resourceLoader = new ServletContextResourceLoader(getServletContext());
                bw.registerCustomEditor(Resource.class, new ResourceEditor(resourceLoader, getEnvironment()));
                initBeanWrapper(bw);
                bw.setPropertyValues(pvs, true);
            }
            catch (BeansException ex) {
                if (logger.isErrorEnabled()) {
                    logger.error("Failed to set bean properties on servlet '" + getServletName() + "'", ex);
                }
                throw ex;
            }
        }

        initServletBean();
    }
我们可以看到, 方法中都是一些启动参数配置的方法, 最后调用了 initServletBean(), 接着往下看看, 是在 FrameworkServlet中实现的:
    @Override
    protected final void initServletBean() throws ServletException {
        // ...
            this.webApplicationContext = initWebApplicationContext();
            initFrameworkServlet();
        // ...
    }
去掉一些日志输出和 catch 代码, 最终 initServletBean 方法中剩下这两句, 看了一下第二行 initFrameworkServlet 方法中是一个模板方法, 但是没有子类实现, 所以就只剩下WebApplicationContext 的初始化逻辑, 也是在本类实现的, 进入康康:
    protected WebApplicationContext initWebApplicationContext() {
        // 1. 包装 ServletContext 为 wac
        WebApplicationContext rootContext =
                WebApplicationContextUtils.getWebApplicationContext(getServletContext());
        WebApplicationContext wac = null;
        if (this.webApplicationContext != null) {
            wac = this.webApplicationContext;
            if (wac instanceof ConfigurableWebApplicationContext) {
                ConfigurableWebApplicationContext cwac = (ConfigurableWebApplicationContext) wac;
                if (!cwac.isActive()) {
                    if (cwac.getParent() == null) {
                        cwac.setParent(rootContext);
                    }
                    configureAndRefreshWebApplicationContext(cwac);
                }
            }
        }
        if (wac == null) {
            wac = findWebApplicationContext();
        }
        if (wac == null) {
            wac = createWebApplicationContext(rootContext);
        }

        if (!this.refreshEventReceived) {
            synchronized (this.onRefreshMonitor) {
                // 2. **核心方法**
                onRefresh(wac);
            }
        }

        if (this.publishContext) {
            // Publish the context as a servlet context attribute.
            String attrName = getServletContextAttributeName();
            getServletContext().setAttribute(attrName, wac);
        }

        return wac;
    }
发现没有什么有价值的代码, 都是一些判断换包装, 最后有一句 onRefresh(wac), 像是 Spring 的命名, 应该是个重点方法, 发现是在子类 DispatcherServlet 中实现的, 进入康康:
    @Override
    protected void onRefresh(ApplicationContext context) {
        initStrategies(context);
    }

    protected void initStrategies(ApplicationContext context) {
        initMultipartResolver(context);
        initLocaleResolver(context);
        initThemeResolver(context);
        initHandlerMappings(context);
        initHandlerAdapters(context);
        initHandlerExceptionResolvers(context);
        initRequestToViewNameTranslator(context);
        initViewResolvers(context);
        initFlashMapManager(context);
    }
接着就能发现 SpringMVC 中, 9 大组件的初始化方法啦, 这个方法的调用链大概就是这样:
HttpServletBean#initFrameworkServlet#initServletBeanFrameworkServlet#initWebApplicationContextDispatcherServlet#onRefresh
1.1.2) SpringMVC 九大组件初始化
只挑两个最重要的讲, initHandlerMappings 和 initHandlerAdapters 方法.
1.1.2.1) initHandlerMappings
    private boolean detectAllHandlerMappings = true;
    public static final String HANDLER_MAPPING_BEAN_NAME = "handlerMapping";

    private void initHandlerMappings(ApplicationContext context) {
        this.handlerMappings = null;

        if (this.detectAllHandlerMappings) { // 默认 True
            // 1. 从 Spring 容器中获取 HandlerMapping 接口的实现
            Map<String, HandlerMapping> matchingBeans =
                    BeanFactoryUtils.beansOfTypeIncludingAncestors(context, HandlerMapping.class, true, false);
            if (!matchingBeans.isEmpty()) { // 2. 如不为空则拿 value 转成 List
                this.handlerMappings = new ArrayList<>(matchingBeans.values());
                // 3. 再根据 @Order 注解排序
                AnnotationAwareOrderComparator.sort(this.handlerMappings);
            }
        }
        else { // 可以在 web.xml 或 SpringBoot 配置文件中修改 detectAllHandlerMappings
            try {
                // 只获取一个 name 为 handlerMapping 的实现
                HandlerMapping hm = context.getBean(HANDLER_MAPPING_BEAN_NAME, HandlerMapping.class);
                this.handlerMappings = Collections.singletonList(hm);
            }
            catch (NoSuchBeanDefinitionException ex) {
                // Ignore, we'll add a default HandlerMapping later.
            }
        }

        // 4. 如果未获取到 HandlerMapping 的实现, 则获取默认实现
        if (this.handlerMappings == null) {
            this.handlerMappings = getDefaultStrategies(context, HandlerMapping.class);
            if (logger.isTraceEnabled()) {
                logger.trace("No HandlerMappings declared for servlet '" + getServletName() +
                        "': using default strategies from DispatcherServlet.properties");
            }
        }
    }
方法上部没啥可以深入的代码, 最后获取默认实现的方法 getDefaultStrategies 我们进去康康:
    private static final String DEFAULT_STRATEGIES_PATH = "DispatcherServlet.properties";
    private static final Properties defaultStrategies;

    static {
        try {
            ClassPathResource resource = new ClassPathResource(DEFAULT_STRATEGIES_PATH, DispatcherServlet.class);
            defaultStrategies = PropertiesLoaderUtils.loadProperties(resource);
        }
        catch (IOException ex) {
            throw new IllegalStateException("Could not load '" + DEFAULT_STRATEGIES_PATH + "': " + ex.getMessage());
        }
    }

    protected <T> List<T> getDefaultStrategies(ApplicationContext context, Class<T> strategyInterface) {
        String key = strategyInterface.getName(); // 1. HandlerMapping
        String value = defaultStrategies.getProperty(key); // 2. 从 DispatcherServlet.properties 中获取 key 为 HandlerMapping 的值
        if (value != null) {
            String[] classNames = StringUtils.commaDelimitedListToStringArray(value); // 3. 分割成字符串数组
            // 4. 创建实例并加入容器和 List 集合
            List<T> strategies = new ArrayList<>(classNames.length);
            for (String className : classNames) {
                try {
                    Class<?> clazz = ClassUtils.forName(className, DispatcherServlet.class.getClassLoader());
                    Object strategy = createDefaultStrategy(context, clazz); // 使用 BeanFactory 创建实例
                    strategies.add((T) strategy); // 加入数组
                }
                catch (ClassNotFoundException ex) {
                    throw new BeanInitializationException(
                            "Could not find DispatcherServlet's default strategy class [" + className +
                            "] for interface [" + key + "]", ex);
                }
                catch (LinkageError err) {
                    throw new BeanInitializationException(
                            "Unresolvable class definition for DispatcherServlet's default strategy class [" +
                            className + "] for interface [" + key + "]", err);
                }
            }
            // 5. 返回
            return strategies;
        }
        else {
            return new LinkedList<>();
        }
    }
最终默认的 HandlerMapping 如下:
BeanNameUrlHandlerMapping: 处理配置文件中定义的映射RequestMappingHandlerMapping: 处理@RequestMapping注解定义的映射RouterFunctionMapping: 处理另一种配置文件中定义的映射
1.1.2.2) initHandlerAdapters
initHandlerAdapters 的代码和 initHandlerMapping 几乎一样, 直接上默认的 Adapters:
HttpRequestHandlerAdapterSimpleControllerHandlerAdapterRequestMappingHandlerAdapterHandlerFunctionAdapter
1.2) 请求处理
我们知道, 正常一个请求发起, 首先会进入 Servlet 中的 service 方法, 然后被 service 方法根据请求的 Method 分发给 doGet, doPost, doPut 等方法, 我们试着康康继承关系中哪些子类重写了 service 方法:
好的, 在继承关系中, 只发现 FrameworkServlet 重写了它, 康康代码:
public abstract class FrameworkServlet extends HttpServletBean implements ApplicationContextAware {

    @Override
    protected void service(HttpServletRequest request, HttpServletResponse response)
            throws ServletException, IOException {

        HttpMethod httpMethod = HttpMethod.resolve(request.getMethod());
        if (httpMethod == HttpMethod.PATCH || httpMethod == null) {
            processRequest(request, response);
        }
        else { // 调用父类 HTTPServlet 的 service 方法
            super.service(request, response);
        }
    }
我们通过代码可以发现, SpringMVC 在 Servlet 的基础上, 额外实现了对 HTTP PATCH 的支持, 平常一般用的不多, 就不深入看了.
然后对于普通的请求, 还是交由父类处理, 那么我们还是得从 doGet, doPost 之类的方法下手, 看看子类实现.
发现还是由 FrameworkServlet 重写了它们:
public abstract class FrameworkServlet extends HttpServletBean implements ApplicationContextAware {

    @Override
    protected final void doGet(HttpServletRequest request, HttpServletResponse response)
            throws ServletException, IOException {

        processRequest(request, response);
    }

    @Override
    protected final void doPost(HttpServletRequest request, HttpServletResponse response)
            throws ServletException, IOException {

        processRequest(request, response);
    }
    // ...
最终都是由本类中 processRequest 方法处理, 康康代码:
    protected final void processRequest(HttpServletRequest request, HttpServletResponse response)
            throws ServletException, IOException {

        long startTime = System.currentTimeMillis();
        Throwable failureCause = null;
        // Locale 国际化相关
        //  获取 ThreadLocal 中 Locale 缓存
        LocaleContext previousLocaleContext = LocaleContextHolder.getLocaleContext();
        //  从请求中获取新的 Locale
        LocaleContext localeContext = buildLocaleContext(request);

        // 获取 request 域中的参数缓存
        //  获取 ThreadLocal 中 request 域参数缓存
        RequestAttributes previousAttributes = RequestContextHolder.getRequestAttributes();
        //  从请求中获取新的 request 域参数
        ServletRequestAttributes requestAttributes = buildRequestAttributes(request, response, previousAttributes);

        // 异步相关
        WebAsyncManager asyncManager = WebAsyncUtils.getAsyncManager(request);
        asyncManager.registerCallableInterceptor(FrameworkServlet.class.getName(), new RequestBindingInterceptor());

        // 将新的 Locale 和 request 域参数更新到 ThreadLocal 中
        initContextHolders(request, localeContext, requestAttributes);

        try {
            doService(request, response); // **核心方法**
        }
        catch (ServletException | IOException ex) {
            failureCause = ex;
            throw ex;
        }
        catch (Throwable ex) {
            failureCause = ex;
            throw new NestedServletException("Request processing failed", ex);
        }

        finally {
            resetContextHolders(request, previousLocaleContext, previousAttributes);
            if (requestAttributes != null) {
                requestAttributes.requestCompleted();
            }
            logResult(request, response, failureCause, asyncManager);
            publishRequestHandledEvent(request, response, startTime, failureCause);
        }
    }
最终我们发现, 调用了一个 doService 方法来实际处理请求响应, 本类方法中为抽象方法, 是子类 DispatcherServlet 实现的, 提到这个类就熟悉了吧:
public class DispatcherServlet extends FrameworkServlet {

    @Override
    protected void doService(HttpServletRequest request, HttpServletResponse response) throws Exception {
        logRequest(request);
        // 保存请求快照, 可用于之后恢复
        Map<String, Object> attributesSnapshot = null;
        if (WebUtils.isIncludeRequest(request)) {
            attributesSnapshot = new HashMap<>();
            Enumeration<?> attrNames = request.getAttributeNames();
            while (attrNames.hasMoreElements()) {
                String attrName = (String) attrNames.nextElement();
                if (this.cleanupAfterInclude || attrName.startsWith(DEFAULT_STRATEGIES_PREFIX)) {
                    attributesSnapshot.put(attrName, request.getAttribute(attrName));
                }
            }
        }
        // request 域中设置了些参数
        request.setAttribute(WEB_APPLICATION_CONTEXT_ATTRIBUTE, getWebApplicationContext());
        request.setAttribute(LOCALE_RESOLVER_ATTRIBUTE, this.localeResolver);
        request.setAttribute(THEME_RESOLVER_ATTRIBUTE, this.themeResolver);
        request.setAttribute(THEME_SOURCE_ATTRIBUTE, getThemeSource());
        // 重定向相关
        if (this.flashMapManager != null) {
            FlashMap inputFlashMap = this.flashMapManager.retrieveAndUpdate(request, response);
            if (inputFlashMap != null) {
                request.setAttribute(INPUT_FLASH_MAP_ATTRIBUTE, Collections.unmodifiableMap(inputFlashMap));
            }
            request.setAttribute(OUTPUT_FLASH_MAP_ATTRIBUTE, new FlashMap());
            request.setAttribute(FLASH_MAP_MANAGER_ATTRIBUTE, this.flashMapManager);
        }
        // 请求域中 request_uri 处理
        RequestPath requestPath = null;
        if (this.parseRequestPath && !ServletRequestPathUtils.hasParsedRequestPath(request)) {
            requestPath = ServletRequestPathUtils.parseAndCache(request);
        }

        try {
            doDispatch(request, response); // **核心方法**
        }
        finally {
            if (!WebAsyncUtils.getAsyncManager(request).isConcurrentHandlingStarted()) {
                if (attributesSnapshot != null) {
                    restoreAttributesAfterInclude(request, attributesSnapshot);
                }
            }
            if (requestPath != null) {
                ServletRequestPathUtils.clearParsedRequestPath(request);
            }
        }
    }
在 DispatcherServlet 中, 最后将请求响应交给了 doDispatch, 此方法即 SpringMVC 的核心方法:
    protected void doDispatch(HttpServletRequest request, HttpServletResponse response) throws Exception {
        HttpServletRequest processedRequest = request;
        HandlerExecutionChain mappedHandler = null;
        boolean multipartRequestParsed = false;

        WebAsyncManager asyncManager = WebAsyncUtils.getAsyncManager(request);

        try {
            ModelAndView mv = null;
            Exception dispatchException = null;

            try {
                // 1. 文件上传判断
                processedRequest = checkMultipart(request);
                multipartRequestParsed = (processedRequest != request);

                // 2. 根据 request 获取 HandlerExecutionChain(包含 Controller 和拦截器链)
                mappedHandler = getHandler(processedRequest);
                if (mappedHandler == null) { // 404
                    noHandlerFound(processedRequest, response);
                    return;
                }

                // 3. 获取 HandlerAdapter(Controller)
                HandlerAdapter ha = getHandlerAdapter(mappedHandler.getHandler());

                // 处理 Last-Modified 请求头返回 304
                String method = request.getMethod();
                boolean isGet = "GET".equals(method);
                if (isGet || "HEAD".equals(method)) {
                    long lastModified = ha.getLastModified(request, mappedHandler.getHandler());
                    if (new ServletWebRequest(request, response).checkNotModified(lastModified) && isGet) {
                        return;
                    }
                }

                // 4. 拦截器链前置执行
                if (!mappedHandler.applyPreHandle(processedRequest, response)) {
                    return;
                }

                // 5. Handler 实际处理, 返回 ModelAndView
                mv = ha.handle(processedRequest, response, mappedHandler.getHandler());

                if (asyncManager.isConcurrentHandlingStarted()) {
                    return;
                }

                applyDefaultViewName(processedRequest, mv); // 6. 如没指定视图名, 给一个默认的
                // 7. 拦截器链后置执行
                mappedHandler.applyPostHandle(processedRequest, response, mv);
            }
            catch (Exception ex) {
                dispatchException = ex;
            }
            catch (Throwable err) {
                // As of 4.3, we're processing Errors thrown from handler methods as well,
                // making them available for @ExceptionHandler methods and other scenarios.
                dispatchException = new NestedServletException("Handler dispatch failed", err);
            }
            // 8. 视图渲染
            processDispatchResult(processedRequest, response, mappedHandler, mv, dispatchException);
        }
        catch (Exception ex) {
            triggerAfterCompletion(processedRequest, response, mappedHandler, ex);
        }
        catch (Throwable err) {
            triggerAfterCompletion(processedRequest, response, mappedHandler,
                    new NestedServletException("Handler processing failed", err));
        }
        finally {
            if (asyncManager.isConcurrentHandlingStarted()) {
                // Instead of postHandle and afterCompletion
                if (mappedHandler != null) {
                    mappedHandler.applyAfterConcurrentHandlingStarted(processedRequest, response);
                }
            }
            else {
                // Clean up any resources used by a multipart request.
                if (multipartRequestParsed) {
                    cleanupMultipart(processedRequest);
                }
            }
        }
    }
DispatcherServlet 中的 doDispatch 方法基本流程:
- 根据
getHandler获取匹配的HandlerExecutionChain(Handler + 拦截器链) - 拦截器链执行
Handler执行- 拦截器链执行
- 视图渲染响应
接着来一步一步的康康源码
1.1) getHandler
protected HandlerExecutionChain getHandler(HttpServletRequest request) throws Exception {
if (this.handlerMappings != null) {
for (HandlerMapping mapping : this.handlerMappings) {
HandlerExecutionChain handler = mapping.getHandler(request);
if (handler != null) {
return handler;
}
}
}
return null;
}
可以看到,
getHandler中会遍历DispatcherServlet中的handlerMappings处理器映射器, 尝试获取HandlerExecutionChain处理器执行链, 如果获取到则返回.
handlerMappings是 Spring 容器初始化时构建的, 那么一般有哪几种呢:
RequestMappingHandlerMapping: 映射通过@RequestMapping定义的HandlerBeanNameUrlHandlerMapping: 映射通过Spring配置文件定义的HandlerSimpleUrlHandlerMapping: 也可以通过Spring配置文件定义映射, 一般在Spring初始化时会往里加载ResourceHttpRequestHandler用于处理资源文件请求.WelcomePageHandlerMapping: 不常用, 一般用于处理映射/路径